|
|
Getting Started #3: Adding Interactions |
Now that you’ve created a new activity in TeacherMade, how do you add auto-scored interactions to it? It couldn’t be easier! Take five minutes to learn how!
This tutorial relies on the completion of the previous tutorial, and especially on creating an Activity from the "Slide Model Mini-Sampler" PDF file. If you didn't get the "Slide Model Mini-Sampler" PDF document yet, you can find it at the bottom of this article.
Let's add a Multiple Choice item to slide 3.
- Using your mouse, click and draw a box to the left of the country names, where you want the multiple choice bubbles to be located.
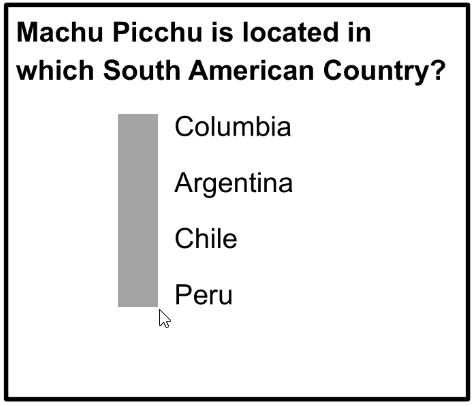
- When you let go of the mouse a pop-up menu appears.

- Select "Multiple Choice."
- The bubbles will be added to the activity, and the toolbar will show options for the Multiple Choice item.
- Set the # of answers to 4 if it isn’t already set that way.
- Click the bubble next to “Peru” to indicate it’s the correct answer. This creates the answer key for auto-grading.

Let's add a Matching item to Slide 4.
- Use the mouse to draw boxes around two items that match (“Cat” and “Meow”).
- Click near the word “Cat” and move the mouse to draw a box around it.
- When you let go of the mouse item menu appears.
- Select "Matching."
- The box that you drew around “Cat” will turn red.
- Now draw a box around “Meow” and select Matching from the pop-up menu.

- Connect the two boxes.
- While “Meow” is still red, click “Cat”.
- Make sure there’s a dotted line between the pair and the boxes are green.
- Don’t worry if you make a mistake! Click "Clear Matching Link" on the toolbar to undo the match.


- Repeat to match "Dog" with "Woof" and "Bird with "Tweet."
It’s EASY, right????
You're doing great! So, let's add our third and final item type to slide 4 - a Hot Spot. The Hot Spot item type lets students click on objects on the page. You set the answer key to tell the system which Hot Spots should be clicked and which ones should be left unclicked.
- Click the mouse and draw a box around the leaf on the right of the flower.
- Select Hot Spot from the item menu.
- An outline with little blue squares around it will appear on the selected part of the diagram.

- Now make the answer key:
- Click on the bubble next to "Correct if: Clicked."

- This tells TeacherMade whether this Hot Spot should be clicked or not in order to answer the question. In this case, the leaf SHOULD be clicked.
- This is also available when clicking the blue "Edit.." button on the toolbar.
- Draw another box over the roots and select Hot Spot from the item menu.
- Click on the bubble next to "Correct if: Not Clicked."
- Repeat that for the top of the flower.
- Now, join all three hotspots together into a group. Just hold down the Shift key and click on each Hot Spot until you’ve added them all. This will score them as a single question.
- When you're done, your hot spots should look like this:

To inspect your work, click the “preview button” (the little computer with the eyeball) at the top left of the tool bar. You will see a preview of this activity. You can even complete the activity yourself to see how it works!
You can also compare your work to one put together by the expert staff at TeacherMade by clicking here: See the TeacherMade Mini-Sampler. How does it compare to yours?
You've transformed a slideshow into an interactive lesson! Now you are ready to assign this worksheet to your students!. Find out how in the next Getting Started guide!
Was this article helpful?
That’s Great!
Thank you for your feedback
Sorry! We couldn't be helpful
Thank you for your feedback
Feedback sent
We appreciate your effort and will try to fix the article